

Beginner Tutorial: How to Manage Version Control in WordPress using Git
If you’ve just started out as a WordPress developer, then your workflow would probably involve setting up a FTP connection, locating and then downloading the desired file, making the essential changes and finally uploading it back to the server via FTP. After that, you refresh your browser page to figure out what went wrong and then repeat the entire process over again.
Even though this approach, often known as Cowboy Coding, gives you autonomy over the development process, it doesn’t guarantee you a reliable, efficient and secure development workflow. For a better WordPress development workflow, you’re required to add another weapon, called Version Control, to your development arsenal.
What Is Version Control & Why Does it Matter?
Imaging if you ever come across any of these two situations during WordPress development:
- You make some changes to a theme file and then unexpectedly find your site not working properly. To fix the issue, you go back to the specific file but couldn’t remember what you did. In such a situation, you’re required to painstakingly figure out all the changes you made to that file.
- For some reasons, you want to go back to an older version of your WordPress theme but are not able to do so because you don’t have any backup.
Think of Version Control as a safety net for situations like these. In other words, it is a system that tracks all the changes made to your files so that you could easily remember what changes you or others made to a particular file at which point in time.
Regardless of the kind of work you do, Version Control is something that you must implement in your workflow, especially when you’re working in teams. Not only it makes collaborating with others infinitely easier but also allows you to keep an overview over every single change made to your files – what happened, when and by whom.
Where Word processors, such as Google Docs and Microsoft Word, have a built in “track changes” version control system, on the other hand, the WordPress post editor comes with a “revision tracking” feature that stores record of each published post or saved draft. Unfortunately, WordPress doesn’t have a built-in version control system to keep revisions of other important things like files and the database, and that’s where Git comes into play!
What Is Git and Why Should You Use It?
Git is a distributed version control management system designed to handle everything – including collaborative working, tracking changes, backup, deployment and more – for projects of all sizes with amazing speed and efficiency. Just like the WordPress post editor, which allows you to undo changes and revert to an earlier version of a post, Git gives you the ability to records revisions for a WordPress project and go back to any desired version of a file whenever necessary.
Currently available for Windows, Mac OS X, Linux and Solaris, Git resides on your personal computer. However, if you’re working with multiple people who don’t have access to your local Git repository, you can easily hook it up with a Git hosting service. Some of the popular Git hosts are GitHub, GitLab, and BitBucket – each of which has a browser-based UI, making it easy for anyone to browse and edit code. While Github is the most popular and preferred choice of WordPress developers for most of the open source projects, both GitLab and BitBucket may also prove to be good options when you’re working on a commercial project.
Here are a few reasons why you should consider using Git:
- Gives you the ability to work collaboratively on a WordPress project.
- A solid backup of your all files.
- Any types of files can be versioned.
- Get rid of awkward file-naming conventions like new-version-copy-v5.
- Has branching and merging capabilities.
- Tiny footprint with lightning fast performance.
In a nutshell, if your development workflow moves between multiple environments, you must use Git to improve it.
Another important thing I would like to mention here is that Git is designed to be used from the command line. However, there are a number of GUI Clients available that offer a graphical user interface, making it easier for you to quickly learn Git and efficiently manage your code.
Getting Started With Git
As I mentioned above, Git is often used to develop things locally, I’m going to assume that you already have a project on your local machine. So in order to set up Git to work with WordPress, all you need to do is to follow these simple steps:
Download and Install Git:
The first thing to do before you start using Git is to make it available on your local computer. Just go to https://git-scm.com/downloads, choose your operating system and the download will start automatically. Once the download is complete, install it on your machine. To check whether or not Git is successfully installed on your machine, open the Git Bash program and type the following:
$ git –version
If everything is okay, you’ll get something similar to:
git version 2.17.0
Set up Your Identity and Initialize a Repository:
Now that you have Git installed on your personal computer, let’s customize your Git environment. Type the following commands to establish your identity:
$ git config –global user.name “Ajeet”
$ git config –global user.email ajeet.yadav@ipraxa.com
To verify your identity, run the following command:
$ git config –list
And your editor should return something similar to below:
rebase.autosquash=true
user.name=ajeet
user.email=ajeet.yadav@ipraxa.com
core.repositoryformatversion=0
core.filemode=false
Git is working well! Now, for the sake of simplicity, let’s change the directory to the Desktop folder:
cd C:/Users/Ajeet/Desktop
Next create a new directory, which will be used to house the custom code, using the mkdir command:
$ mkdir GitDemo
This will create a new folder called GitDemo on your desktop. Now let’s move inside the GitDemo folder.
$ cd GitDemo
Run git init Command:
Now that you are inside the GitDemo folder, run git init command to initialize your local Git repository.
$ git init
This will create a new sub-folder named .git, which contains all the necessary repository files, inside the GitDemo folder.
Move Project Files into the New Repository:
Once you have initiated your local Git repository, move your all project files to the GitDemo folder and type the command below:
$ git status
Your editor will return something like this:
On branch master
Initial commit
Untracked files:
(use “git add <file>…” to include in what will be committed)
file.html
nothing added to commit but untracked files present (use “git add” to track)
Stage and Commit Your Code:
The next thing to do is to stage our project. Doing so will set all the project files up to commit (or captured). So type the following command:
$ git add –all
Now if you type:
$ git status
Your editor will return:
On branch master
Initial commit
Changes to be committed:
(use “git rm –cached <file>…” to unstage)
new file: file.html
So finally, we can commit our files. Type this command:
$ git commit -m “Initial Commit”
Congrats on your first commit! With a message (-m) of what’s being changed, the above command will capture your code at its current state. To verify the commit, type:
$ git log
Your editor will return the code similar to:
commit 4ef691bd10bde51e39414393a7f7770ef8fd461d
Author: ajeet <ajeet.yadav@ipraxa.com>
Initial Commit
Set Up a GitHub Account:
Now to push your changes live, go to github.com and set up a user account. Once you’ve created the account, create a Github repository with the help of the green button, called “New repository”, given available in the right of your newsfeed.
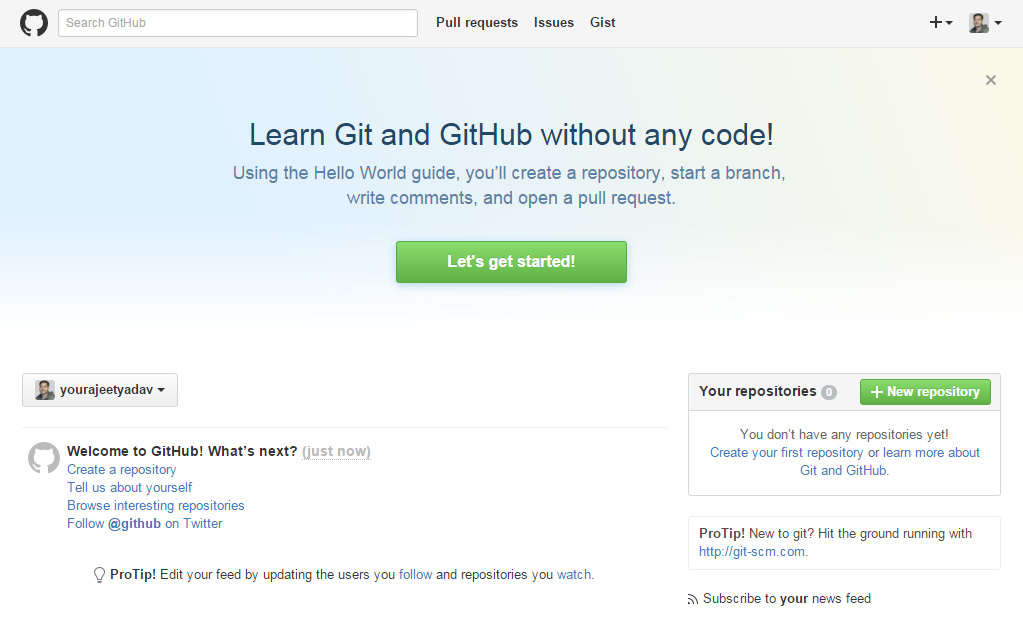
Let’s call the repo you created GitDemo.
Push To GitHub:
With your repo created, you will see a screen like this:
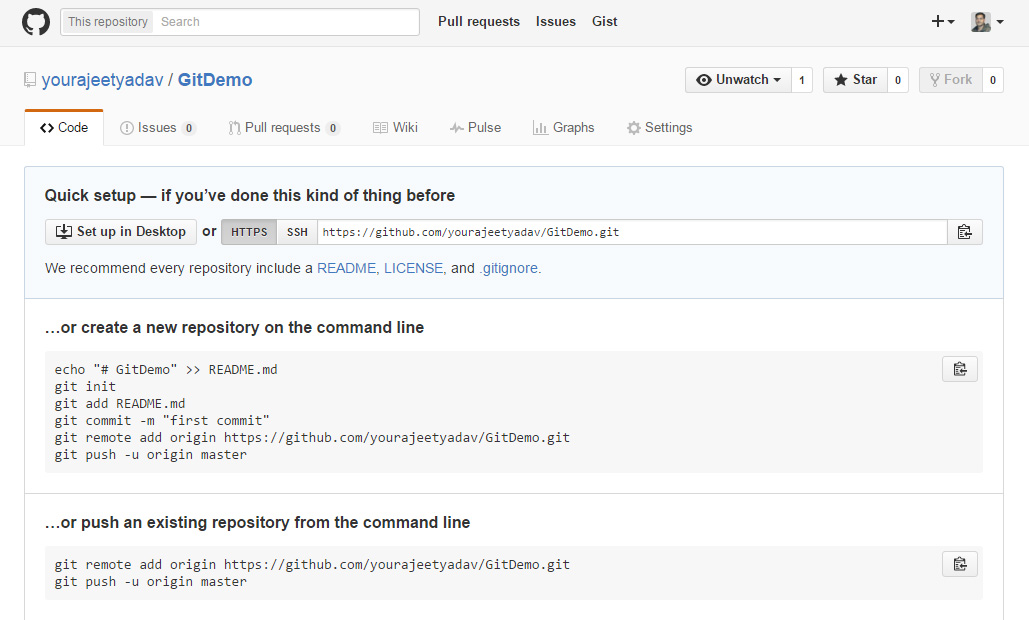
As you can see, Git provides you with three options: creating a new repository using command line, pushing an existing repository and importing code from another repository. To push our existing local repository, we’ll choose to use the second option. So type the following command in your command line editor:
$ git remote add origin https://github.com/USERNAME/GitSample.git
$ git push -u origin master
Note: Don’t forget to replace USERNAME with your ‘real username’ on GitHub.
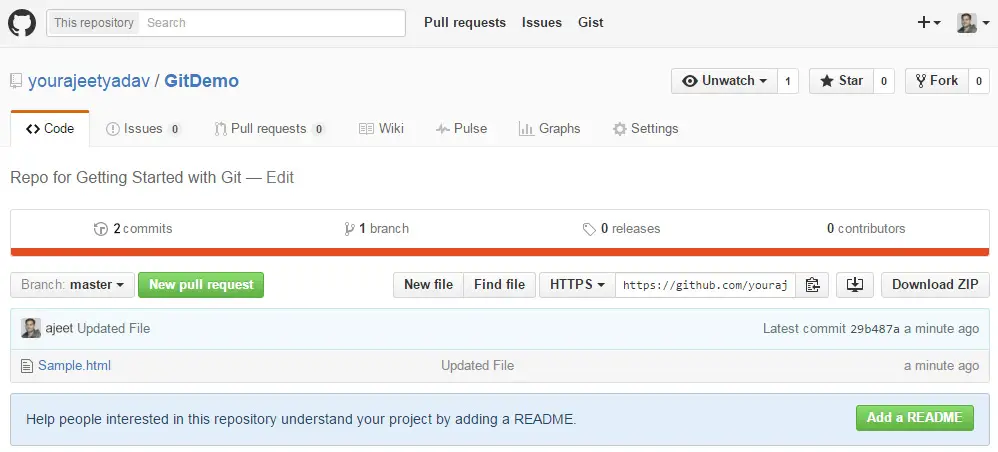
Refresh your repo page on GitHub and you will see your local Git repository has been pushed to your Github account, as shown below.

So in future, if you made any changes to any file of your project, all you need to do is to first commit those changes locally and then push them to Github using the following three lines of commands:
$ git add –all
$ git commit -m “Updated File”
$ git push -u origin master
Needless to say, all your changes then will be shown within your Github account, as below:
ABOUT THE AUTOR :
“Ashish is an experienced web developer working with XHTMLJunction – PSD to WordPress Provider. He always tries to keep himself up with latest web development trends and technologies to boost his productivity and capabilities. In his spare time, he loves to write articles related to WordPress, Web Design, App Development, and eCommerce”


Leave a Reply
Want to join the discussion?Feel free to contribute!